Getting the most out of an AI tool like Midjourney is no easy task, but these commands and tricks will help you save time and find the image you were looking for.
Artificial intelligence tools to generate images have become the bread and butter of thousands of users who use them to bring out their creativity. One of the main protagonists is Midjourney, which does not stop improving its results.
However, all this does not come out of nowhere, and on the part of users, it still requires a good prompt, also known as an indication, so that everything works as it should, but it should be noted that there are also some specific commands and that it already includes the tool itself from Discord that almost does the job for you.
Do you want to join two or more images? Do you want me to describe a photograph in text? Would you rather it not include certain objects without having to write it down word for word? For all this and more, there are concrete commands like /blend or /stylize to save you time.
That’s why here are seven commands to get the most out of the tool, explained one by one, so you really understand what makes each one so special.
Table of Contents
7 Commands and Tricks to Save Time and Create Perfect Images in Midjourney
1. Merge command: /blend
This blending command allows you to combine two to five different images in the tool to create a new composition that blends them all into one. Simply type “/blend” instead of “/imagine” and upload the images you want to merge.
2. Describe the command: /describe
In this case, you can use Midjourney to get just the opposite. You can give it an image by using the “/describe” command to generate descriptive text of what’s in the image.
It’s quite useful if, for example, you want to create a new image from that one. You can use the text it gives you to put it back into the tool and pull up a similar one with the same details. You save time by not having to really think about what to write.
3. Parameter “no”
Here it’s no longer about commands but about small guidelines or tricks that are quite logical to use, but if you don’t fall into including them, the truth is that it can generate an image that you weren’t looking for. If, for example, you want to create a landscape but avoid something that will surely be added, such as trees, it is as simple as qualifying it in your message with a “do not include.”.
4. Parametro “Stylize”: –s
This one is a bit more technical, but what you will achieve is that the image you are looking for adjusts according to your preferences to a specific artistic style. In this case, you should add “–s” to the end of your message, followed by a number ranging from 0 to 1,000.
For example, if you write “I want a baroque-style landscape with a sunset –s10,” it will probably give you an image tied to what you want. The lower the number, the more closely tied it will be to the style you’re going for. Clarify that here you should use the command “/imagine” as is normally done to create images.
5. Repeat parameter: –repeat or –r
Following in the wake of the previous concept, in this case ending your sentence with “–repeat” or directly with “–r” Midjourney will simultaneously generate four images from a single message to allow you to choose your favorite. To do this, type “–r 4” if you want them to take four images of the same message they have written.
6. Parameters for weird images: –weird or –w
This parameter is really fun, and as its name suggests, if you want to take the AI tool to the extreme when creating images, you just have to include “–weird” or, in a shortened form, “–w” so that the result is completely crazy.
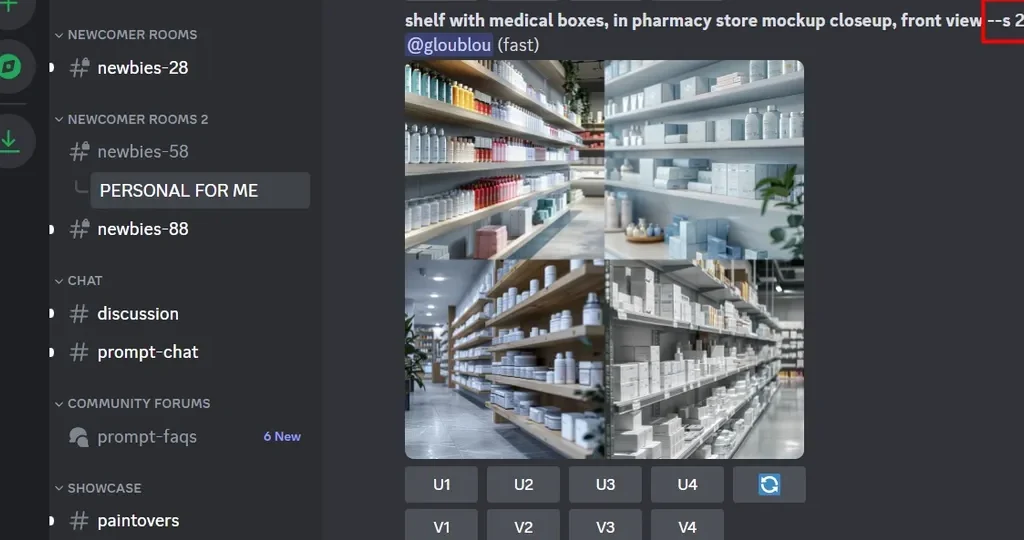
Just as in the case of choosing how tight you want the style to be in the image to be generated, the same thing happens here. You must accompany the parameter with a number between 0 and 3,000. Here, the smaller the number, the less weird the image you create. For example, “a flying cat with steampunk style (w 100”. In this case, and as you can see in the image, the style is nuanced, and –s 150 is added, combining both parameters.
7. Tile Parameter: –tile
Finally, if you want to create a mosaic or a pattern to create a wallpaper or print, avoiding the cuts or differences between one and the other that are usually generated when creating four or more images, you just have to add the “–tile” parameter at the end of your message.
Conclusion
This will create an overall but separate image into four that follow the same pattern, so you can use it as a whole that makes sense overall. Using this tool powered by artificial intelligence is certainly somewhat more complex than others such as Adobe Firefly or DALL-E, but using these commands and parameters exclusive to Midjurney, the truth is that you get images that are more faithful to what you are looking for, and you don’t spend half an hour trying to nail it.

